Tabs In Microsoft Powerpoint 2007
Create pan and zoom effects in Power. Point 2. 00. 7By Glenna R. Shaw, Microsoft Power. Point MVP, and owner of the Glenna Shaw Visual Communications site. Although Power. Point allows you to easily create and distribute photo albums, the end result is the typical slide show that simply recreates the old slide projector shows of the 1. You can add action to your electronic photo albums through the use of panning and zooming effects made famous by the documentary photographer Ken Burns. Wikipedia states, .
For example, in a photograph of a baseball team, he might slowly pan across the faces of the players and come to a rest on the player the narrator is discussing. This article also assumes knowledge of applying animations and their settings.
Begin by turning on grids and guides. These will help you with placement of several items as we work and more easily help you identify the center of the slide which is very important. I choose not to snap any objects because I like a little more control, but you may find snapping objects easier for you. Create a panorama.
The advantage of a panoramic picture is that it shows so much more than a traditional photograph. For example, I have a new swimming pool that I want to send pictures of to my family, but regular pictures just don't convey the overall effect very well. My solution is to create a panoramic shot of the entire pool.
To do this, I stood in one location and took my first picture, turned slightly to the left, took the second picture, and so on. I then stitched these photos together on my slide by aligning and grouping them. I've shown the pictures in my example with green lines to highlight the concept. You will not want lines on your photos. I then right- clicked on the grouped object, clicked Save as Picture, and saved my new panorama picture as Pool. Panorama. jpg file.
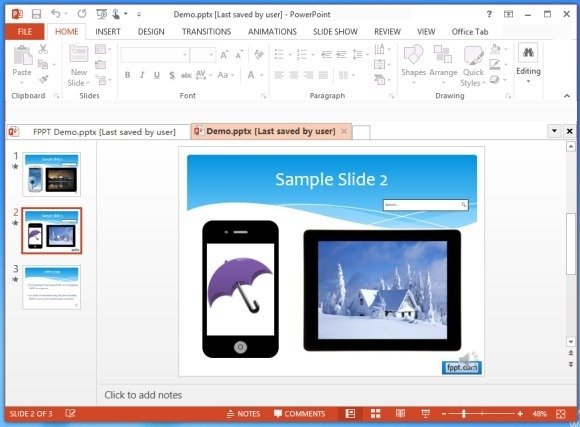
2 MS PowerPoint 2007 New Interface When you open PowerPoint 2007, you will notice that it looks quite different from PowerPoint 2000 and PowerPoint 2003.
- Learn to add slides, add notes to slides, run slideshow, understand parts of the interface.
- Office Tab by Extend Office is an application which allows working in a tabbed interface in MS Office applications including Word, Excel and PowerPoint.
I next deleted this grouped object and inserted the Pool. Panorama. jpg file on my slide and used the cropping tool under Picture Tools, on the Format tab, in the Size group, to make the top and bottom of my panorama picture even. I then aligned the picture with the left side of the slide. For best results, the width of your panorama should be a multiple of 1. Selecting the Smooth start and Smooth end check boxes will slightly slow down the animation at the beginning and end of the motion path, so that's a matter of preference. Pan across a photograph. Adding a panning effect to a group photo allows you showcase both the group and the individuals.
I'll begin by inserting my picture on my slide. Higher resolution photos will look better, but you may have some issues with them truncating. If this happens to you, decrease the resolution of the picture. You'll want your picture to be as high quality as possible, because (when zoomed) it will lose some of the quality. See this Power. Point MVP site for additional information: Power. Point FAQ: Scans, Resolution, DPI section.
I resize the picture to fit the slide. To do this, I right- click on my picture, click Size and Position, and then format the picture to a height of 7. Make sure to lock your picture’s Aspect Ratio or they’ll look distorted by selecting the Lock aspect ratio check box. I now have a photo centered on the slide. For this example, I want to pan across my family's faces, so the first thing I'll want to do is decide where I want to start and where I want to end. To do this, I need a rectangle that's proportional to the slide.
For my example, I'll use a 3- by- 4- inch rectangle shown in bright yellow. Now I copy and paste a duplicate rectangle and move it to where I want the panning to end. I align the rectangles top and bottom and use the rectangles as a guide to crop my photo. Finally, I delete the yellow rectangles, resize my photo to the height of my slide, align it on the left side, and then use the same steps to create the left motion path that I did in the panorama example above. Note: Once again, you'll want the width to be a multiple of 1. I made my photo 2. Now my photo pans across my family's faces.
Zoom in and out. If you'd like to emphasize a single object in your photo, zooming in and out is very effective and easily accomplished. In my example I'll spotlight my little grandson. How To Install Vlc Player In Ubuntu Through Terminal Value more.
I begin with the same photo on my slide and copy and paste a duplicate exactly over the top of the first photo. Then I clip the second photo around my little grandson. I've added a yellow line to show the clipped area.
You'll want your clipped photo to be proportional to the slide. I made mine 3- by- 4 inches.
Now I resize the clipped photo to fit the entire slide and add an entrance animation of Faded Zoom, After Previous, Delayset to 2 seconds, and Medium speed. I also add an exit animation of Faded Zoom, After Previous, Delay set to 2 seconds, and Medium speed. My photo will now display the entire family photo, wait 2 seconds, zoom in on my little grandson, wait 2 seconds, and zoom back out to my entire family photo.
Unfortunately, the zooming only occurs from the center of the slide, so the effect still isn't quite what I'm looking for, and I'll have to add a motion path to give the impression of zooming in on the lower- left quadrant where my grandson is located. To do this, I move the clipped photo so that it's fairly centered over where my grandson is in the original photo. I now click Draw Custom Path (after clicking Motion Paths) and draw a custom motion path from the center of my clipped picture to the center of the slide. Finally, I move the sequence of the custom motion path line in my animations to Start With Previous with my Faded Zoom entrance animation, and make sure the speed is set for Medium to match my Faded Zoom entrance.
You can reorder the sequence of any animation by dragging it up or down in the Custom Animation task pane. I also lock my custom animation path (select Locked in the Path drop- down list, Custom Animation task pane) so I can move my picture around while I'm editing and keep the path the way I want it.
My last step is to add a custom animation to my clipped picture to go from the center of the slide to the start point of the other custom motion path. To do this, I have to move the picture to the center and middle of the slide and add a custom motion path to go from the center of the slide to the center of where my grandson is sitting in the original picture.
I then apply the same settings to this custom motion path as I did in the first: With Previous, Medium speed and Locked. My picture now zooms in from the appropriate location and zooms back out again to the appropriate location. Combine zooming and panning. In my previous examples, I was able to spotlight different family members, but not all of them in a cohesive sequence. What I would really like to do is zoom in and pan across my family's faces, ending with a close- up of my little grandson.
To do this, I add an enlarged copy of my photo over the top of the original and use this to create my zoom effect. You may be tempted to use the Grow/Shrink animation effect, but the degraded resolution makes this a poor choice if you’re working with photos. I copied and pasted a duplicate of my picture on the slide and resized it as desired.
Remember some large pictures may get truncated when you run the slideshow, so take that into consideration when you resize yours. I made mine 1. 5 inches wide. This makes it difficult to view the entire slide, so I change the window size to 4. Middle and Center of the slide. I then add a 7. 5- by- 1.
Flowchart that has no fill, and I set the line color to contrast with my picture and make it a heavy line so I can easily see it. I place this crosshair shape over my first zoom and pan point. I then copy and paste two more crosshairs and place them over my other pan points. The end result is a large image of my picture and three guides that I'll use to set up my custom animations and delete when my effects are finished.